Behind the Scenes: Studio M Room Virtualization
behind the scenes:
studio m room virtualization
Alan Meyerson's "Studio M" is part of Hans Zimmer’s Remote Control Productions studio complex in Santa Monica, California. Over 100 film scores have been mixed here including X-men, Captain Marvel, Lion King, Dunkirk, Dune, and Interstellar - just to name a few. Join us as our acoustic engineers walk you through the process of virtualizing this legendary space.
STEP 1
HEAD AND TORSO SIMULATOR
Meet Brian 2.0, Embody’s B&K HATS (Head and Torso Simulator) Model 5128. Having been born with a microphone in each ear, both powered by a B&K 1704-A CCLD, Brian is particularly well suited to his role as "studio sweet spot sommelier."
Before we begin measuring studio monitors, we adjust Brian's position, posture, orientation, and even chair height to match Alan's listening position exactly. Unfortunately Brian doesn't have arms, so he can't do this part himself.
STEP 2
SPEAKER AND MICROPHONE ROUTING
Next we use a RME Fireface UCX audio interface to receive signals from both HATS microphones, and to send signals to each studio monitor at the same time.
During this process, an Embody proprietary software is running on a MacBook Pro to send excitation signals to studio monitors while simultaneously collecting and analyzing signals from HATS microphones.
STEP 3
AZIMUTH AND ELEVATION MEASUREMENT
Studio M has a 7.1.6 speaker setup that Alan Meyerson personally designed and tuned himself. Each speaker is positioned at a very specific location in both azimuth and elevation relative to Brian 2.0's listening position.
Using a laser measurer, we calculate the distance from Brian 2.0 to each speaker, and the distances between each speaker. This data is then used to derive a 3D geomtrical map of the studio in which the exact angular positions of each speaker are determined.
STEP 4
VIRTUAL SPEAKER PLACEMENT
After the 3D model of the room has been created, we virtually recreate each speaker at the exact azimuth and elevations recorded. For example, Studio M's Left Front Height speaker is at a 26° elevation and -45° azimuth with respect to Brian 2.0's "sweet spot" listening position. It is also at a directed distance of 2.75m - in case you were wondering.
STEP 5
EXCITATION TIME
Now it's Brian 2.0's time to shine. We excite each speaker by pushing a full bandwidth proprietary signal through the entire chain including mix console, power amplifiers, custom delays, and EQ. The signal then reverberates through the acoustic space, into Brian's ears.
The signal reaches Brian's Left and Right ears at different times; this is called interaural time delay. Brian's head and ear shape further alter the signal so that capture includes his unique HRTF (Head Related Transfer Function). This is done for all 7.1.6 speakers until the acoustic response of Studio M is fully virtualized.
STEP 6
PUTTING YOU IN THE SWEET SPOT
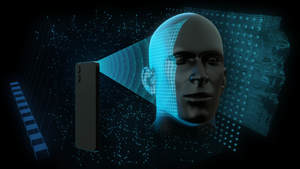
In order for you to swap seats with Brian 2.0, you must first download the Immerse Virtual Studio | Alan Meyerson signature edition plugin from here. After installation, you'll be promoted to scan a QR code in order to upload your right ear image. This will be used to create your own Personalized HRTF in under 30 seconds.The plugin will then swap Brian 2.0's HRTF with yours while keeping all other room mesurements intact.
Once this is done, you'll be ready to mix from the sweet spot of Alan Meyerson's iconic Studio M.
 Immerse Gamepack FINAL FANTASY XIV 2.3 Update
 Introducing Immerse Headphone EQ
 Overdrive Immersive Mix Competition
 Embody at MixNik 2023!
 Coconut Headset Announcement
 GCP Partnership Press Release
 Interview with Justin Gray
 Interview with Kurt Martinez
 Technology at Embody
 A Sound Architect's Guide to Spatial Audio on XR Devices

